Foam Rolling Tips To Improve Your Recovery & Performance
Physiotherapist Max Duncan from Physio Smart demonstrates his top techniques for foam rolling and gives you a run through on how to relieve muscular tension to feel more comfortable in your body from the inside out.
With a wide variety of massage and recovery tools currently on the market, there are multiple ways to care for your muscles and support your recovery through fascia training.
Fascia training tools like foam rollers and massage balls allow you to apply pressure to ‘roll out’ muscle knots or trigger points. Foam rolling can benefit everyone - whether you're an everyday athlete participating in parkrun or training for your next (half) marathon. Including foam rolling as part of your self-care ritual can allow you to perform better, recover faster and reduce the risk of injury.
Check out Max’s tips and Sportitude Running's summary below.
Foam Rolling & Your Fascia
Foam rolling provides a self-massage, more technically called a self-myofascial release (SMR) or self-myofascial treatment (SMT).
It improves the range of movement of the fascia, the connective tissues that envelop your muscles, bones and organs. Your fascia interconnect these structures to form and support the ‘architecture’ of your body like organic ‘scaffolding’.
When healthy, your web-like fascia will glide against each other with every movement while stabilising the position of muscles. Overworked muscles, inactivity, poor posture, injury, trauma, dehydration, stress and fatigue can cause your fascia to contract and tighten, forming trigger points that can cause a sensation of stiffness or soreness.
One of the primary goals of foam rolling is to release this tension and improve the mobility of the fascia. This translates to improved flexibility, ensuring you are less injury-prone out on the road and allowing you to move easier and more efficiently.
Fascia training also helps hydrate your tissues through compression and release - allowing the water you drink to ‘pump’ through your body’s natural irrigation system to get to where it needs to be. It prevents your fascia from drying out so it stays supple and functions effectively to prevent sore, tight spots.
Foam Rolling Benefits
Foam rolling has multiple benefits pre- and post-workout, particularly in supporting recovery. Foam rolling can improve your short-term performance and long-term flexibility as a regular part of your fitness program.
Improved flexibility translates to more energy-efficient muscle movement and may enable you to generate more physical force or power output to apply into your training and race day. Including foam rolling as part of a balanced fitness routine may also reduce the effects of DOMS (delayed-onset muscle soreness) or aid in rehabilitation.
Prior to lacing up in your running shoes, foam rolling can help warm-up muscles, kick-starting your body into gear. It boosts circulation to transport oxygen-rich blood to your active muscles to improve performance. It also helps limber up tight muscles to prepare your body for stretching and the full range of movement that running and other high intensity workouts entail.
Post-workout, foam rolling can act as a relaxing self-care ritual, reducing cortisol levels (the ‘stress’ hormone) and allowing your mind and body to gradually transition to a more sedentary state. Like we mentioned previously, it increases circulation – fuelling fatigued muscles with the oxygen and nutrients they need to recover.
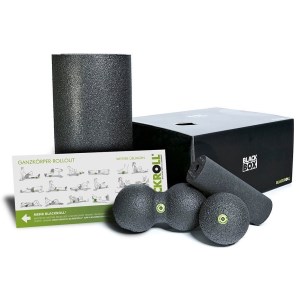
Fascia Training Tools
With multiple fascia training tools for massage and recovery available from leading brands like Blackroll to rejuvenate your home gym, it’s important to use the right tool for the right job (or in this case, the right self-myofascial release tool for the appropriate trigger point).
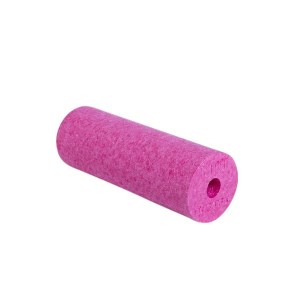
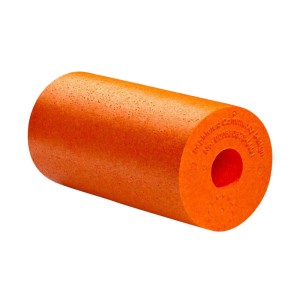
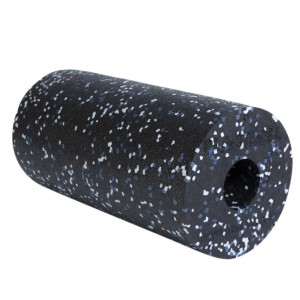
Standard Foam Roller
Standard foam rollers provide a more generalised massage of large muscle groups or broader areas including your calves, quadriceps, hamstrings and glutes. They’re available in soft, medium or hard densities with smooth or grooved surfaces for a gentler or deeper massage effect. Smooth textures are suitable for everyday athletes new to fascia training and are versatile for addressing a variety of muscle aches, whereas grooved textures are ideal for accessing stubborn trigger points and provide relief of more severe muscle knots.
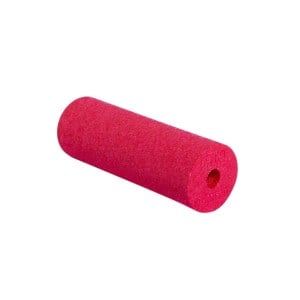
Mini Foam Roller
Travel-friendly mini foam rollers allow you to isolate specific areas like your neck, shoulders, arms, feet and legs. Depending on the body part you’re massaging, they can be applied against a table, floor or wall for the most effective results. They also make it easy to apply pressure to sore, fatigued feet by rolling underneath the soles and arches.
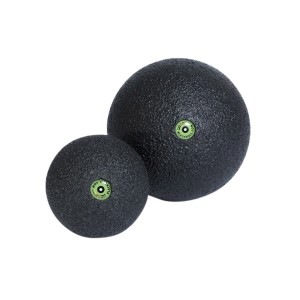
Massage Ball
Unlike a foam roller, a massage ball has a sphere rather than cylindrical shape to target trigger points of your neck, shoulders, upper arms, calves and feet. They’re available in standard single or 'duoball' styles and feature smooth textures for a gentler pressure or spiky textures for a firmer effect. Massage balls can be applied to your upper arms or back when leaning against a wall to target those tricky-to-reach muscle knots, or alike with the mini foam roller, to work out muscle knots by rolling between your feet and the floor.
Massage Roller Stick / Muscle Roller Stick
Massage roller sticks traditionally are rod-shaped self-massage tools and unlike foam rollers, they rely on you to apply the pressure with your hands as opposed to with your body weight. They feature hand grips on the sides to easily roll over trigger points and are available in multiple lengths including travel size. They're available in firm or cushioned models and various textures including spiky to work deeper into the muscle tissue. Some massage roller sticks may even vibrate to offer a rejuvenating effect and further stimulate blood flow or integrate ice therapy into the design.
Foam Rolling Techniques
The basic techniques of a foam rolling exercise can be broken down into the following steps:
1. General Rolling
After identifying the general muscle area you wish to address (e.g. calves), use a standard foam roller to pass up and down the length of this area beneath your body. By firstly covering a broader area, you can identify specific zones of stress or tightness (trigger points) to target in the next stage of the exercise.
2. Specific Rolling
Once you’ve identified a trigger point or muscle knot, centre it above the roller then gently rock side to side, in large circles or up and down in small movements for a deeper tissue massage to add gentle, targeted pressure.
3. Active Movement
Active movements add another dimension to your foam rolling exercises, helping to actively relieve tension in specific areas. For example, if you identify a trigger point on your calves, you can centre your foam roller beneath this area and slowly move your foot up and down or rotate your ankles in circles for a deeper, more pinpoint tissue massage.
These principles can be applied to most areas but avoid foam rolling over your ankle bone, kneecap, the back of your knee, shinbone and hip bone to prevent unnecessary discomfort.
We’ll discuss in more specific detail how you can use standard foam rollers to relieve tension in your calves and peroneals (outer side of the calf), quads and hamstrings and upper back.
Foam Roller Exercise For Calf & Peroneals – Below Knee
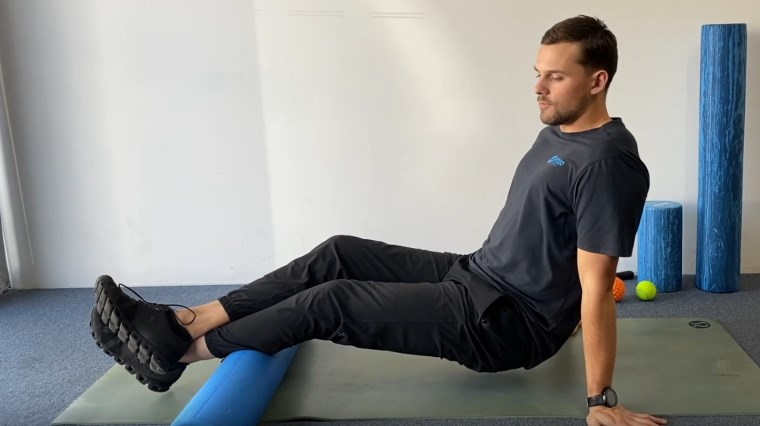
Position the foam roller centred underneath your calves and ensure proper body alignment by beginning with your hands directly beneath your shoulders. You can address both legs simultaneously by keeping them both in contact with the foam roller side by side or apply more pressure to a single leg by crossing one leg over the other.
Using your hands on the ground as support, lift your weight up so your bottom is raised above the mat, and pass the roller up and down the area between the ankle and knee - but not as far as the ankle bone or behind the knee. Elevating your hips further off the ground can be used to add additional pressure to the calves.
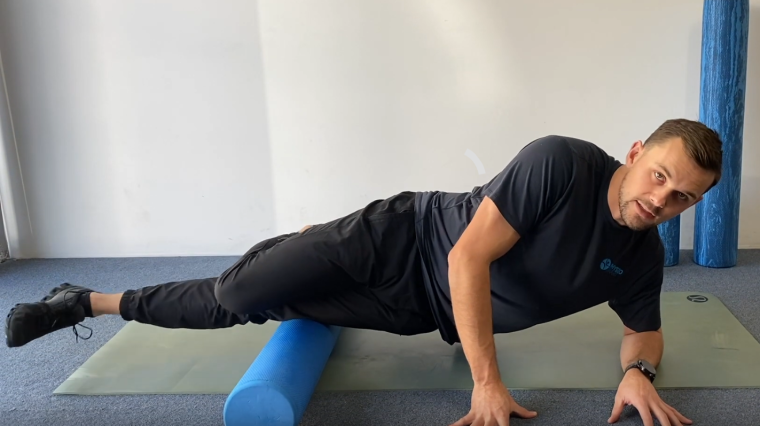
To address your peroneals, roll to your side with your hip down and hands on the ground to help guide the rolling motion up and down the area between ankle and knee. You may choose to have one leg behind the other or on top of the other in a side plank position to add more pressure to the target leg as you pinpoint trigger points. To relieve this pressure on the leg in contact with the foam roller, you can cross over and extend the top leg forward so it’s touching the ground.
Foam Roller Exercise For Quadriceps & Hamstrings – Above Knee
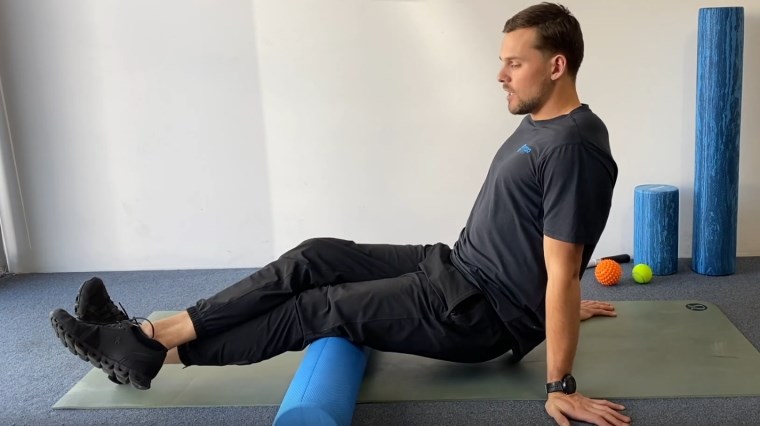
Position the foam roller underneath your hamstrings (upper leg). Begin with a double leg roll, with both legs side by side to ease into the foam roller exercise and roll both hamstrings gently but simultaneously.
Roll the foam roller back and forth between the back of the knee and towards the glutes. As the hamstring is a large muscle, you can break this down into two parts if preferred – the area between the back of the knee and your mid-hamstring, and the area starting from the mid-hamstring to just below your glutes.
Alike with the calves, you can apply more pressure to a single leg by crossing one leg over the other and by keeping your hips elevated off the ground. As we touched on earlier, apply the foam roller in circular motions or rocking side to side as needed to identify and address trigger points.
Address the side of your quad and through to your ITB (iliotibial band - outer thigh) by rolling to the side. As you pass the foam roller back and forth between the knee and just below your glutes, perform active movement by bending and straightening the knee of the leg you’re currently applying pressure to for a deeper tissue massage. The knee of the other leg can remain bent throughout the exercise.
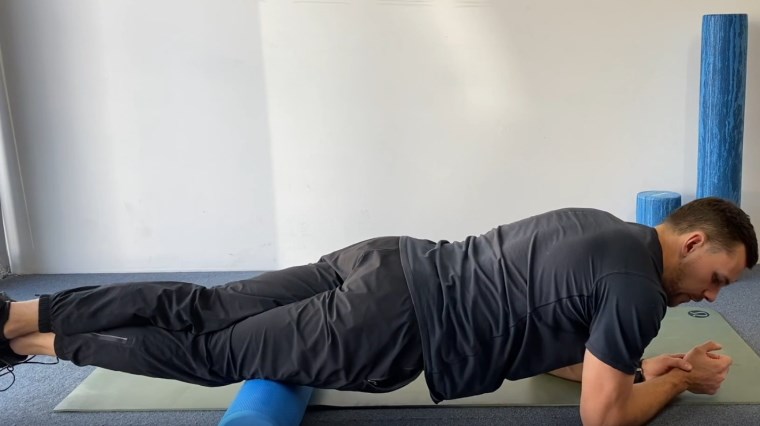
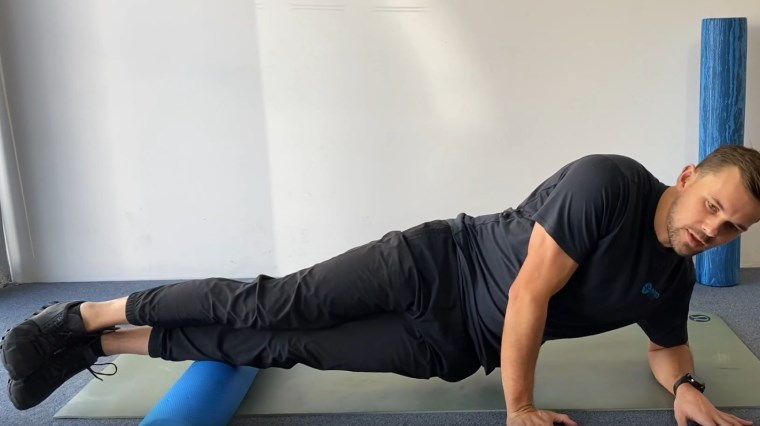
Roll over onto your front so the foam roller is directly on the front of your quads and your head is facing the mat. Keep your upper body supported by your forearms. Again, you can apply a gentler, even pressure by rolling both legs simultaneously or apply greater, more targeted pressure by crossing one leg over the other.
Engage your core to prevent your upper body from collapsing towards the ground as you roll the foam roller back and forth between the knee and towards the hips.
Foam Roller Exercise For Glutes & Hip Flexors

Position your bottom centred on the foam roller and shift your weight from side to side to ease into the exercise. Crossing one leg over the other, continue to rock side to side to target areas of tightness.
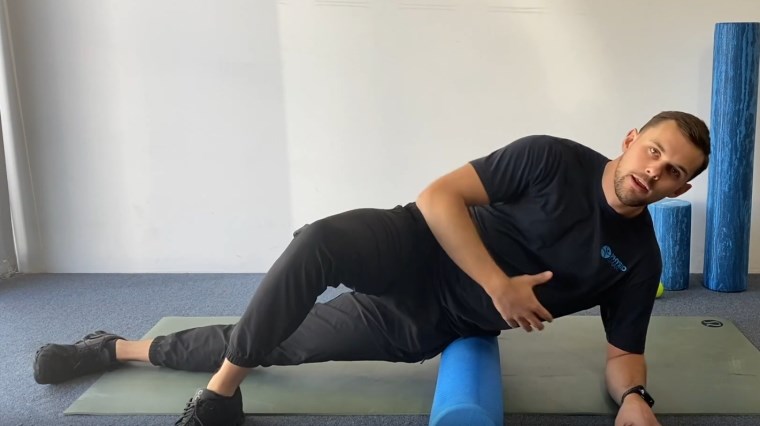
Rotate to the side with the foam roller underneath your body to apply pressure. Extend the equivalent leg away from your body. Stretching this leg long can assist in opening your hips.
Cross over the other leg with knee bent either in front or behind your body for additional support. Rock your upper body forward to address your hip flexor or back and over to apply pressure to your glutes. Avoid rolling through the pelvis bone or hip bone, but pressure can be applied safely to surrounding areas.
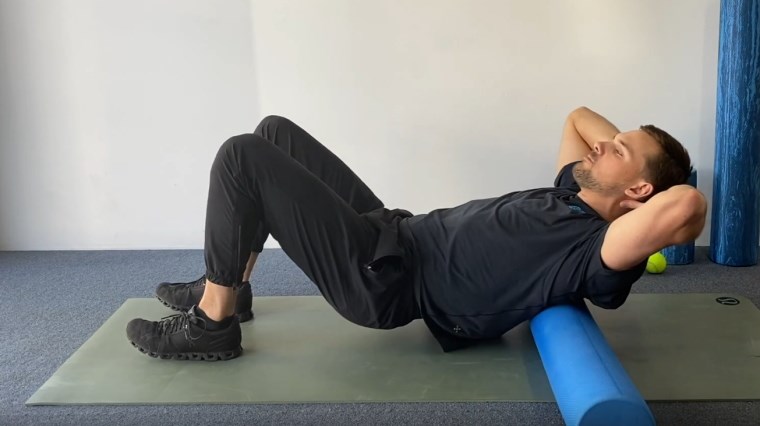
Foam Roller Exercise For Upper Back
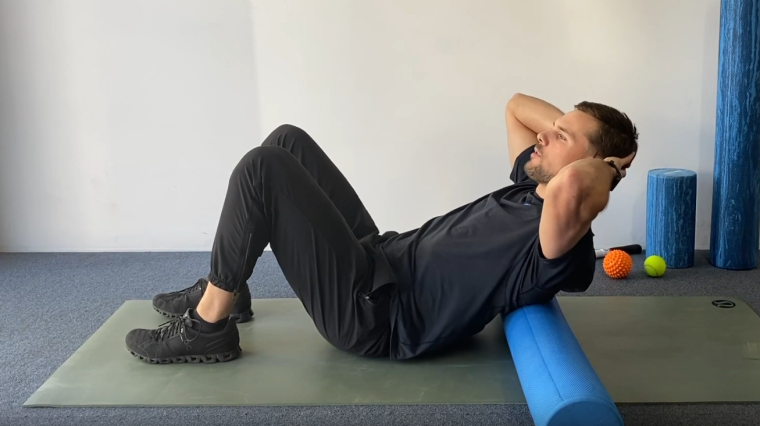
Position the foam roller beneath your upper back with your knees bent, feet tucked towards your body and hips on the ground. Place your hands behind your head to support your neck, with elbows pointing outwards. Perform small movements to roll the foam roller and apply gentle pressure to your upper back.
Lift your hips to extend the motion, rolling the foam roller back and forth over a broader, more generalised area of your upper back to help you find specific sore, tight areas or muscle knots.

To address a specific trigger point, continue supporting your head with your hands and brace your core. Slowly roll backwards over the foam roller in a controlled and gentle movement to open through your mid and upper back. Hold for two deep breaths, then shift the roller up to address other areas of soreness on your upper back and repeat. You can also rock your upper body from side to side or towards your hips on either side.
Please note: We don’t recommend applying a large foam roller to the lower back as this can be harmful. To address tension in your lower back, lean up against a wall and use a massage ball to apply gentle pressure. Target the muscular areas on either side of your lower back, avoiding applying pressure to your spine.
The Wrap Up
Foam rolling has multiple benefits in both priming your muscles for physical activity and in supporting muscle recovery. From improving your flexibility and blood circulation to releasing tension, it’s a valuable part of your balanced fitness program. However, it’s important to not overdo it or apply pressure too aggressively or quickly.
Consult your physiotherapist for guidance in your fascia training and foam rolling technique to practice active recovery safely and effectively. If you experience consistent or chronic muscle tension, it can be an indication of another issue that may need to be addressed in relation to your strength, stability or mobility.
Subscribe to the Sportitude YouTube channel so you never miss out on other practicals tips for runners and the latest running shoe reviews.
Happy rolling!
If you liked this you'll love:
Everything You Need To Know About Massage Guns
The Best Small Massage Gun: Blackroll Fascia Gun Review
-
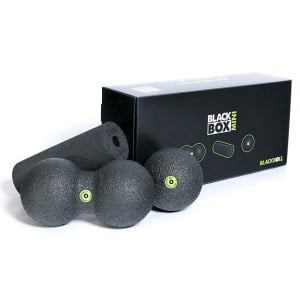
 Blackroll Blackbox Set - Foam Roller & Massage Ball Set
 -
Blackroll Blackbox Mini Set – Foam Roller & Massage Ball Set
-
Blackroll Block Set - Mini Foam Roller, Massage Ball & Yoga Block Set
-
Blackroll Pro Foam Roller - Hard