
6 Rejuvenating Yoga Poses You Can Do In Bed
Rise and shine sleepy head! Your alarm clock is blaring, sun is glaring in through the window and all you want is to cocoon up in your blankets and snooze for another 5… 10… let’s say 15 minutes.
Don’t let the snooze button have its way – instead, get your meditation on by practicing these energising and stress-fighting yoga poses for a morning pick-me-up.
The rest of your day from your pre-work coffee fix to your 5pm dash for the train will look brighter for it.
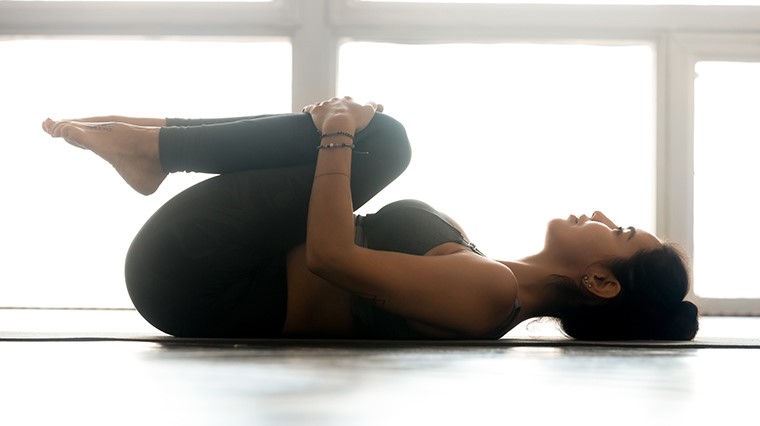
Wind-relieving pose (Apanasana)
About:
If your stomach is doing loop-de-loops and your bloat monster is out in full force, this knee-to-chest pose is even more comforting than a warm, fuzzy blanket and will help you feel more like you – the glass half full version.
Give your huggable self some love with this calming, restorative pose. You’ll feel a passive, long stretch in your back to soothe lower back tension, gain the digestive, bloat-fighting benefits and feel mentally lighter as you let stress float away.
How to:
- Lie flat on your back with arms close to your sides. Bend one knee and then the other in a smooth motion. Inhale as you simultaneously draw both knees close to your chest in a gentle movement.
- Lace the fingers of equivalent hand around each knee or wrap your forearms around your knees and clasp hands over opposite elbows to hold a firmer position.
- Extend the stretch by elongating your spine up to your tailbone and allow your body to sink down into a neutral spinal position. Although the ‘knee hug’ will naturally lift your bottom up, aim to keep your lower back rooted to the bed (or yoga mat). The primary focus is a long, relaxed spine.
- Hold the pose for as long as is comfortable.
- (Optional) Deepen the stretch further by raising your head and chest off the bed, lifting your tucked chin towards your knee until touching if comfortable to do so.
Tip:
Once in wind-relieving pose, rock gently from side to side to softly massage your spine.
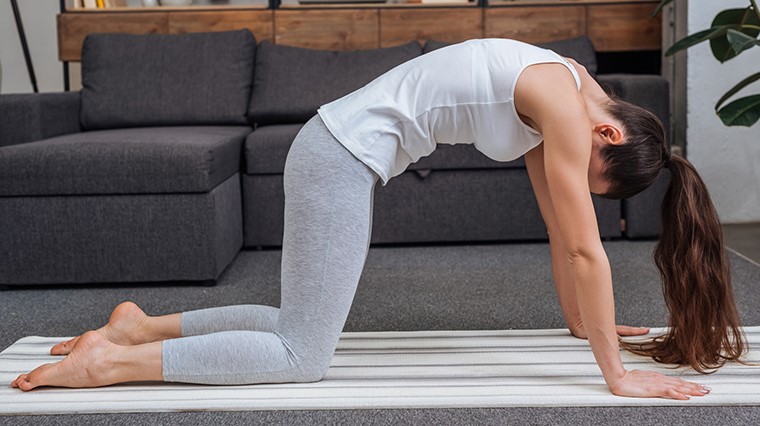
Cat-cow pose (Chakravakasana)
Below: Cat pose (Marjaryasana)
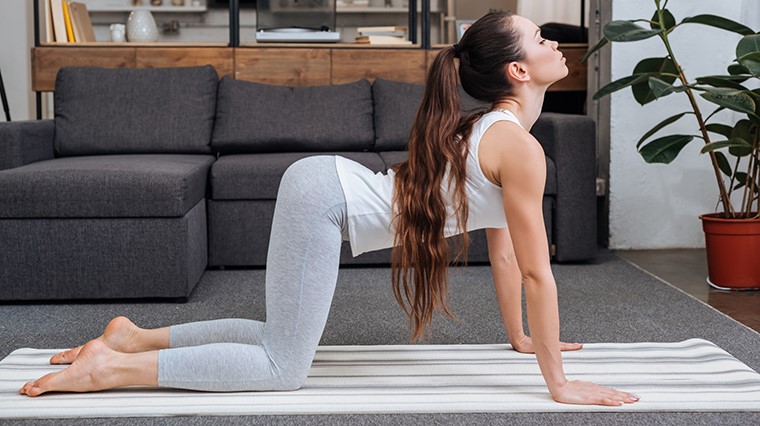
Below: Cow pose (Bitilasana)
About:
Cat pose and cow pose are a pair, transitioning into each other with a flowing pelvic tilt and spinal stretch. They gently engage the abdominal muscles, loosen up and encourage flexibility of your spine and release tension in your neck.
This relaxing warm-up sequence is beginner friendly and may help boost your proprioception (awareness of your body in space).
It’s particularly beneficial to soothe back pain, making it amazing for anyone with a desk job! Perform the sequence in harmony with your breathing to aid in calming of the mind.
How to:
- Table top position: Arrange yourself on your hands and knees, with wrists and shoulders aligned and knees below your hips. Spread your palms wide with squared shoulders, neck long and eyes facing the bed (or yoga mat).
- Engage your core. Press into the bed with your hands and tops of your feet to maintain correct posture, creating an even weight distribution and a solid foundation. Your spine should start in a neutral position.
- Cow pose: On the inhale, roll your shoulders back away from your ears as you gently raise your chin and tailbone towards the ceiling, gazing upwards. Allow your belly to naturally lower towards the bed and release tension during the movement. This will create a natural inverted arch or 'U' shape in your spine.
- Cat pose: As you exhale, engage your core to ‘scoop’ your abs inwards and draw your spine upwards into a rounded arch (visualise a string attached to your upper back that is gently pulling taut and lifting it up). Look in towards your belly button with chin slightly curled towards chest. This pose resembles a traditional ‘Halloween cat’.
- Reverse the position in a smooth motion, softly transitioning between cow and cat poses as you inhale and exhale. Repeat until your body is warmed up - about 5 to 10 times.
Tip:
If you’re performing cat-cow pose on a yoga mat, fold a blanket beneath your knees to keep them cushioned throughout the stretch.
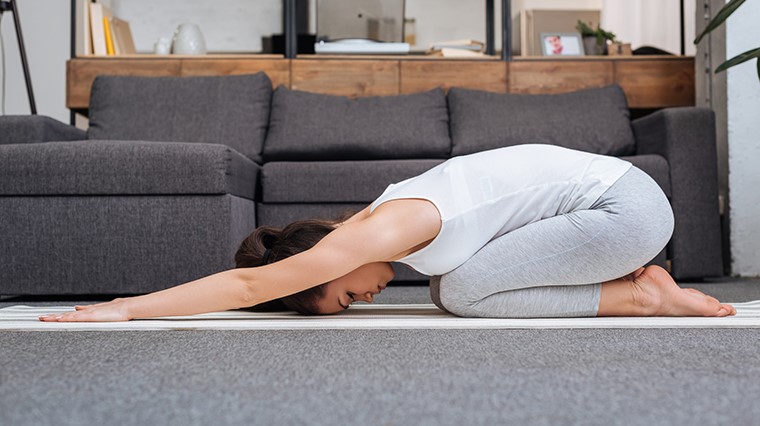
Child’s pose (Balasana)
About:
Child’s pose is a perfect starting point for beginners and is used as a relaxation pose to help keep your mind centred and body rested between standing poses.
It offers a gentle, passive stretch of your lower back muscles and may relieve tension and alleviate hip and lower back pain as well as ease bloating and support healthy digestion.
With your head down, you feel like you’re in a private bubble of relaxation.
This pose can be held for long periods of time – helping you weave away stress and find relief from the twisty thoughts for the day to come.
How to:
- Arrange yourself on all fours, with wrist and shoulders aligned and knees below your hips.
- With knees just wider than your hips (or as open as is comfortable) and big toes touching, slide your hips back so your bottom rests over your heels.
- Exhale as you lower your torso forward, tucking your head down so your forehead rests on the bed (or yoga mat).
- Elongate your arms in front of you, feeling the stretch through your shoulders.
- Aim to perform steps 2 to 4 simultaneously in a smooth, flowing movement. Allow your body to sink into the pose.
- Hold child's pose for 30 seconds and up to 3 minutes. Inhale and return to an upright position.
Variation:
Omit step 4, alternatively resting your arms alongside your body with palms facing upwards.
Tip:
If the level of flexibility required for child’s pose causes discomfort, use a pillow to prop up your head and torso off the bed for support, with head resting on the side.
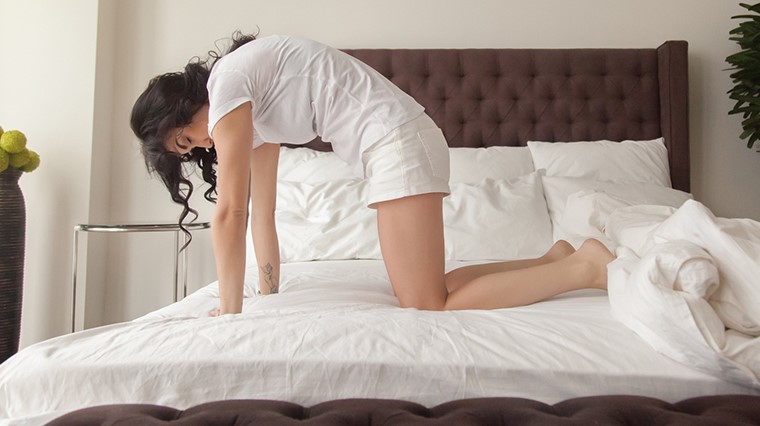
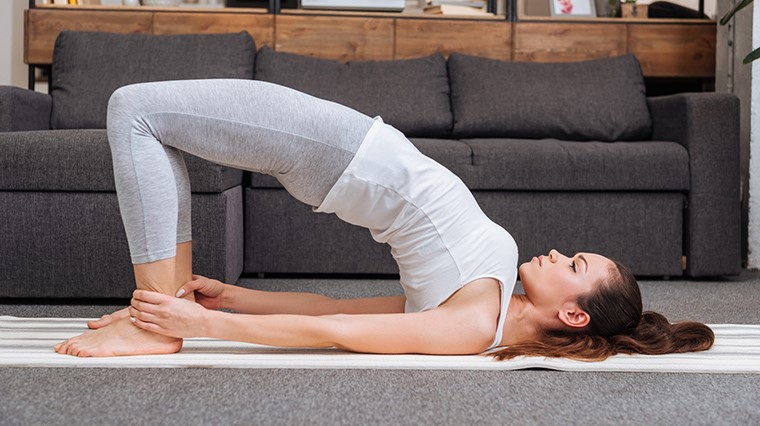
Bridge pose (Setu Bandha Sarvangasana)
About:
Bridge pose opens the chest, shoulders and hips and may assist in improving posture in your day to day lifestyle and promote proper running form.
This backbend pose has bloat-busting benefits, stimulates blood circulation and strengthens key muscles in the legs like hamstrings and adductor muscles as you elevate your pelvis and hips.
Although you’re giving your legs a workout, bridge pose in its nature is a restorative, cooling posture, with a calming effect on your mind to sooth workday worries and may even help fight off your grumpy period pain monster.
Pictured above is the four-footed pose (Chatush Padasana) variation of bridge pose.
How to:
- Lie on your back with knees bent and a hip-distance apart and heels close to your bum (if you’re able to touch your heels with your fingers, you’re spot on).
- Keep your feet connected to the bed (or yoga mat) with weight distributed evenly throughout their base, and arms remaining closely by your sides with palms down. Root your arms and shoulders to the bed, opening your chest.
- Press into the bed with your feet and arms as you lift your tailbone and hips up and away from the bed. Your bum will rise naturally to follow but avoid the temptation to tighten your glutes - allow them to remain soft and relaxed by instead, focusing on engaging the thighs and legs. Allow your tailbone to extend towards your knees and breastbone towards your head during the movement.
- (Optional) To deepen the stretch, interlock your hands beneath your raised body, with pinkie side down. Avoid turning neck during pose – keep it lengthened, relaxed and still to maintain support and prevent injury.
- Hold position for 30 seconds to 1 minute. Unlace your fingers (if doing step 4) and press your palms into the bed on either side of your body, keeping arms close to your sides for support.
- Exhale as you release the pose, gradually lowering your hips back onto the bed and allowing your knees to relax in a bent position.
Variation:
Four-footed pose (Chatush Padasana): If preferred and it’s comfortable to do so, clasp your ankles with equivalent hands at the end of step 1 to lock in the pose, and maintain this hold throughout the length of the movement. This variation can take a little wriggling to get into, but if you're a yoga newbie and it's too tricky don't sweat it and stick to the steps for the beginner-friendly version.
Tip:
If performing on a yoga mat, a yoga block can be inserted beneath the hips for support.
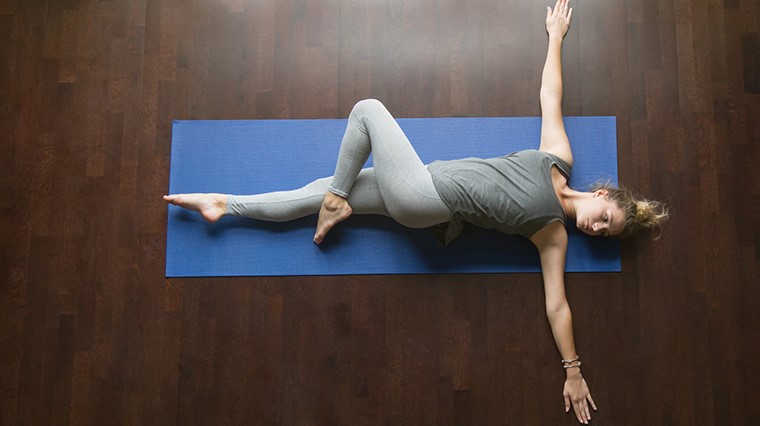
Supine spinal twist (Supta matsyendrasana)
About:
If stress is knotting up your insides, the reclined supine twist is fantastic beginner’s heart opening pose to wring it out like a wet rag and feel lighter for the mental release.
The physical act of ‘twisting’ your abdominals can help ease tummy troubles and restore digestive health, as well as provide a soft internal ‘massage’ for your organs.
This full-body stretch targets spine, obliques and glutes, opens the chest and gently tones your abdominals.
How to:
- Lie on your back with hands outstretched to your sides, palms facing down and in line with your shoulders, so your body forms a ‘T’.
- Bend your right knee and cross it over your left leg, positioning your right foot outside but next to your left knee.
- Place your left hand on your bent right knee and apply gentle pressure as you rotate your knee to the left side. At the same time, gently turn your head to gaze in the direction of your right arm extended to the right side.
- Only touch your bent knee to the bed if comfortable - don't force it. Keep shoulders down and rooted in place. Hold the twist for at least 30 seconds, concentrating on your breathing.
- Gradually rotate your right knee back and return your body to the original supine position (step 1), with legs straight and outstretched arms forming the hat of the 'T'.
- Repeat the twist with opposite leg and hand.
Tip:
Position a folded blanket underneath the bent knee for padding and support, preventing it from 'floating' if you're not touching it to the bed or yoga mat.
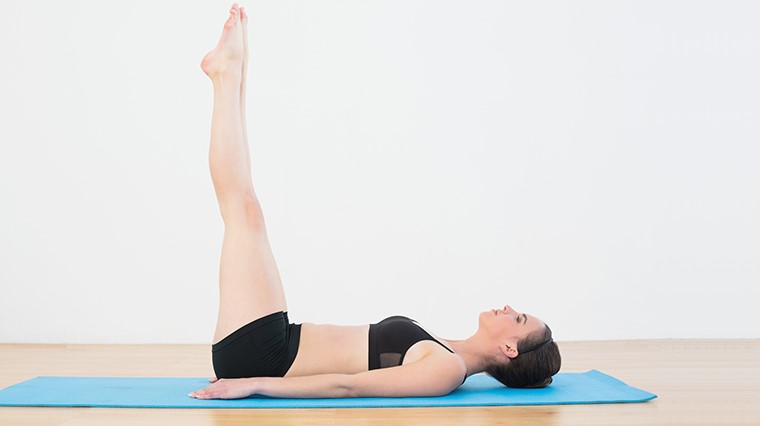
Legs-up-the-wall pose (Viparita karani)
About:
When paired up with mindful breathing and a wall to support your legs, this mild inverted pose is your serine slice of 'nothing' in a busy, all-out schedule and gives you a fresh perspective to recharge, unwind, and find inner calm.
It acts not only an invigorating morning move, but as a real life-saver to speed up your post-run recovery by offering relief to fatigued 'jelly legs' after a sweat session.
This restorative pose provides a gentle stretch of the lower back and hamstrings, relieves back pain and eases tummy troubles.
How to:
- Sit with your side against the wall (keeping a little free space for 'bum room' between it and your body) with knees bent and feet in front of you on the bed or just outside your yoga mat, if using. If preferred, start from a seated position on the side of the bed, with your feet on floor and the side of your upper body facing the wall. This position can provide a little extra momentum for the next step.
- On an exhale, swing your legs towards the wall, extending them upwards and using the wall to support your heels, with the base of your feet facing the ceiling. Simultaneously, lower your head and shoulders to the bed in a smooth and gentle motion, lying on your back with upper body and legs forming a near 90-degree angle or 'L' shape.
- Rest your arms by your sides with palms facing upwards. Choose the most comfortable position while keeping your upper body planted to the bed.
- Assess your comfort. If you are flexible like a pretzel, your glutes (bum) can rest flush against the wall. If your body feels stiffer and you feel any tension in your hamstrings, shimmy your hips further away from the wall, creating a wider angle with your body. Keep your legs slightly firm to keep them vertical without difficultly.
- Hold pose for 5 to 10 minutes, eyes closed and let your stress melt away.
- To release the pose, bend your knees close to your body and in a gentle rolling motion, pivot your body to one side, resting on the bed. When you’re ready, use your palm to gently press into the bed and lift your body up and into an upright seated position.
Tip:
Position a plush pillow or folded blanket beneath your hips to prop up your bottom and support your lower back. This can be performed while in pose by pressing the base of your feet against the wall to provide support as you elevate your hips and insert prop beneath them. Adjust as necessary.
A rolled-up towel or small blanket can be placed in the gap between your neck and bed to encourage a healthy posture of the head and neutral position of the neck, increasing your comfort. Slide any props out of the way prior to step 6.
Please note:
Please consult a medical professional before practicing yoga following surgery, if you suffer from neck, spine, or knee injuries or other conditions, or are pregnant.